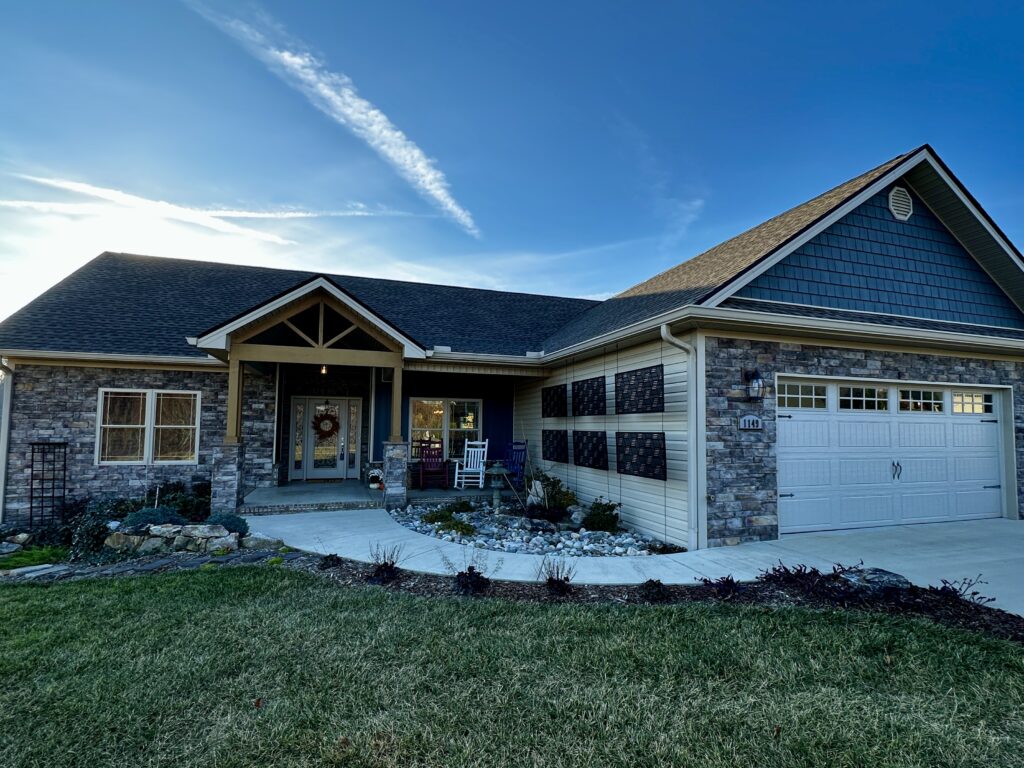
AMSV - One Coat Stucco with a Stone Look
AMSV (Adhered Manufactured Stone Veneer), also referred to as ASV (Adhered Stone Veneer), has boomed in popularity among builders in the last 10-15 years. It’s easy to see why; it’s a beautiful product that can add character to other “plain” siding types, such as fiber cement, brick veneer, and vinyl siding. It’s typically used in conjunction with these other sidings as accents, localized to areas around garage doors, used on first or second stories only, around windows, and any other areas to add a nice look.
Are You Ready To Be Bored?
This article, unfortunately, will be full of details, acronyms, illustrations, and references. While this may not be an “exciting” post, I believe it is a must-read for anyone who owns a home with this cladding, for anyone looking to purchase a home containing ASV, and for Home Inspectors who inspect homes clad with ASV. This article will also be linked to in my home inspection reports to provide a deeper dive into its installation and related problems. The information, requirements, and installation methods found herein are taken from the NCMA 5th Printing based on ASTM C1780.
So What Is ASV?
Most people have heard of stucco, and stucco is an excellent cladding product when installed properly and maintained. Unfortunately, stucco systems have the same problems as ASV due to improper installations and missing details. ASV is essentially a one-coat stucco system with manufactured stone adhered to the stucco’s scratch coat.
Manufactured Stone – It’s not Real Stone?
No. The “stone look” is essentially a cementitious material manufactured to give the look of natural stone. Any cementitious material is porous in nature in comparison with real stone, and porous materials allow for the migration of water through the product due to capillary action and vapor drive. Here lies the problem and why so many details are required during its installation to protect the wall framing components that lie behind. However, there is Real Stone (Thin Stone) that is applied using all the same details, which can also have the same problems.
What is Vapor Drive?
Vapor drive is simply the movement of moisture through a material. Vapor drive is the action of moisture transferring through the material from the warmer side toward the cooler side. Here in the South, where I live, we will have moisture moving from the exterior toward the interior for most of our three seasons. This vapor drive accelerates the more significantly the temperature differs between the exterior ambient temperature and the interior conditioned areas of the home.
Bulk Water and Related Infiltration
Now, let’s talk about rainfall events. Remember, this is a porous material, so imagine a 1/2” rainfall event. The outside of the material becomes saturated, and due to capillary action and vapor drive, this water will move through this product toward the wall cavity and underlying wooden framing components. Multiple flashing requirements and details are required to achieve a “drainage plane” to keep this water and moisture from reaching these wooden components. And therein lies the point of this article. These details or multiple portions are almost always missing or done improperly.
Layman’s Installation Requirements
99%+ of installations in our area are over wood-framed wall assemblies and OSB sheathing, and the following will describe the installation related to this method. We start with what most people refer to as a “house wrap,” which some people call “Tyvek” which is a brand name of a WRB. WRB (water-resistive barrier) is the proper term.
We need two layers of a proper WRB to achieve a drainage plane (preferably one layer of WRB would be used, and the second layer would consist of an entangled mesh type of drainage mat), encouraging drainage of moisture/water to the base of the product to allow it to migrate from behind the material. Unfortunately, the simplest details are not followed, so we won’t likely see installers use an entangled mesh mat, but it should be encouraged.
After the WRB installations, flashing details should be performed, and these flashings should be integrated with and behind the WRB. THIS IS ONE OF THE MOST IMPORTANT COMPONENTS OF THE INSTALLATION AND ALSO THE MOST OVERLOOKED. These flashings are REQUIRED at multiple locations, including but not limited to at horizontal transitions, over windows, over some through-wall protrusions, over entry and garage doors, at eave/fascia to sidewall terminations (kickout/diverter flashing), at roofing sidewalls, at transitions between wall framing and foundations, etc. The weep screed (essentially an “L” shaped piece of flashing) is also integrated into the WRB at the base of the material’s termination and at any rooflines. This “weep screed” protects the sill/sole plate of the wall framing and allows any water to migrate away from the wall cavity at the base.
Next, a stainless or galvanized metal lath is secured to the wall assembly in compliance with ASTM C1063. Then, a Portland cement mix (called the scratch coat) is added over the lath. The scratch coat should cover the entirety of the lath at a thickness of no less than 1/2″, leaving a 3/8” gap around vertical transitions (at windows, differing sidings/materials, etc.) for the installation of an expansion gap covered later. This scratch coat should only be applied in temperatures between 40 and 90 degrees. After partial curing (thumbprint-hard), the surface of the scratch coat should be scratched or scored horizontally to promote the adhesion of the stones to come. After a curing time of 24 hours, the scratch coat is lightly wetted. The manufactured stones are installed onto this scratch coat by applying 1/2” of Portland cement to the entirety of the back of the stone (called the butter coat). Then the stone is “worked” onto the scratch coat by applying lateral pressure and rocking and rotating the stone back and forth until the stone feels secured onto the scratch coat. This will allow some of the Portland cement to “ooze” around the stone and indicates a proper “set.” The total depth of the scratch and butter coats should equal one-inch.
Finally, we come to the finishing details. Backer rods and ASTM-approved sealants are used at vertical transitions (expansion joints), and a casing bead should preferably be used in these applications for a clean look and proper performance. Several flashings will also need to be embedded into sealant at this time as well.
As detailed as this may seem, this is a gross oversimplification of the total process, but I did want to express the basics and some critical installation requirements.


What are the Repercussions of An Improper Installation and Missing Details?
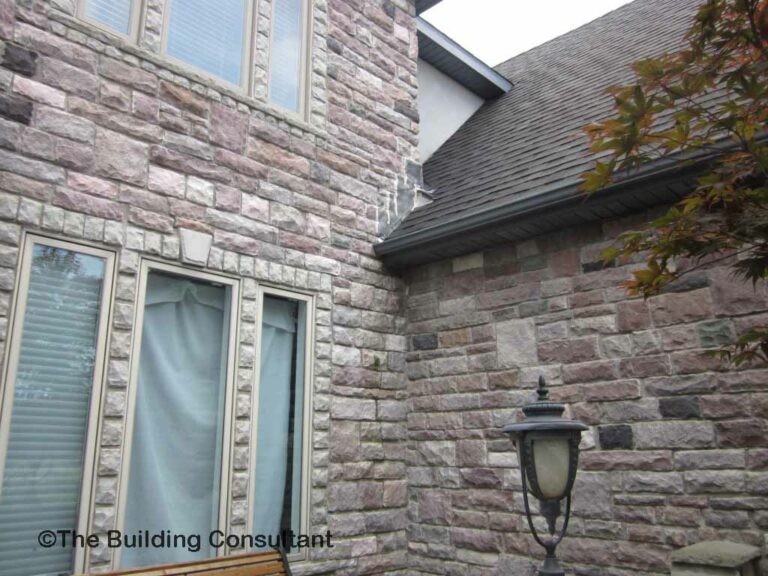
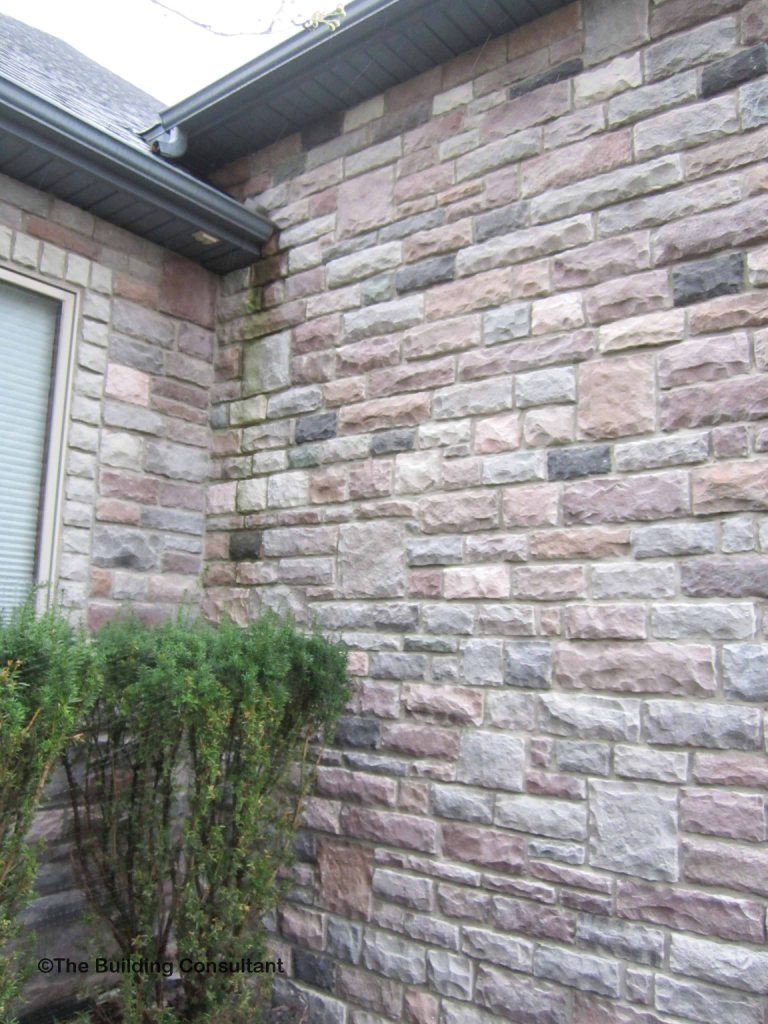
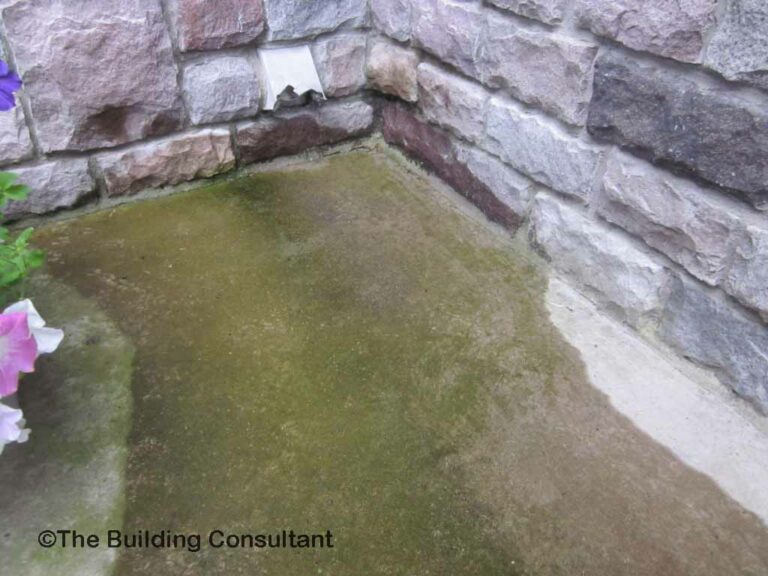
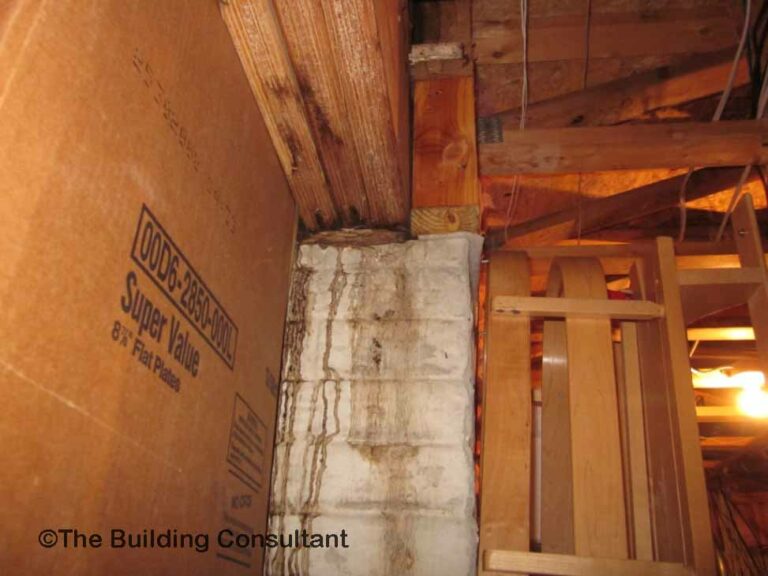
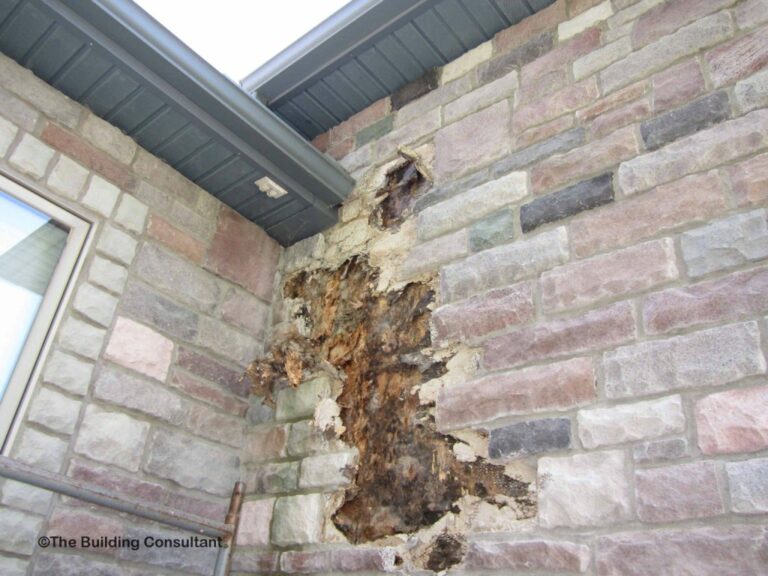
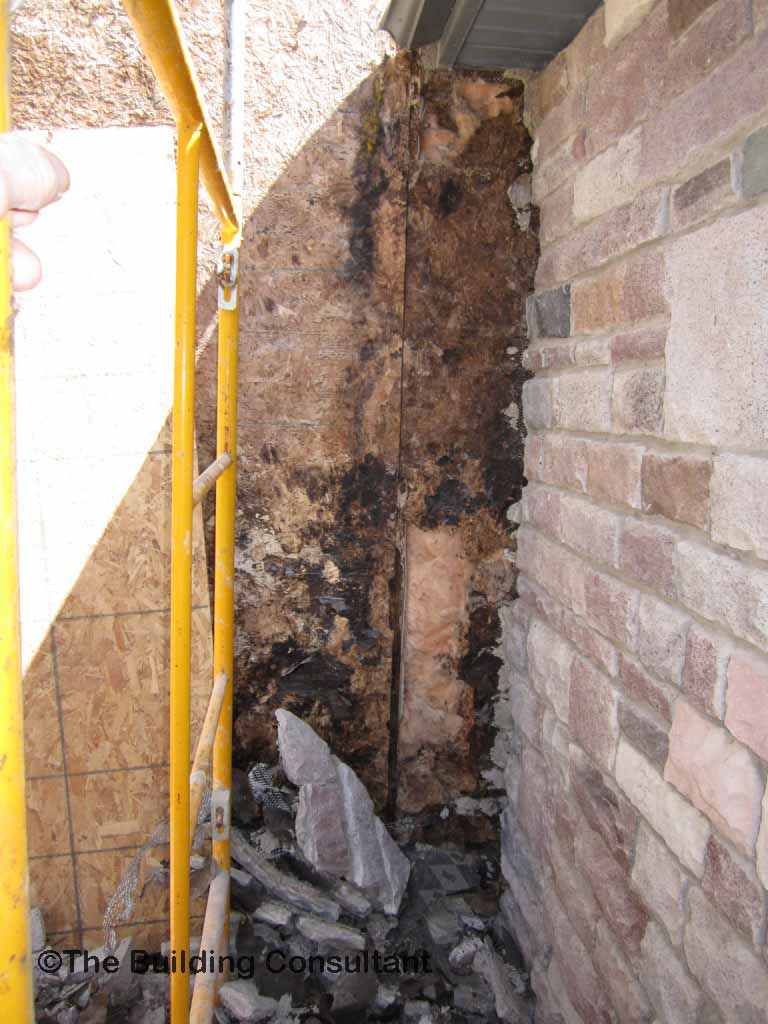
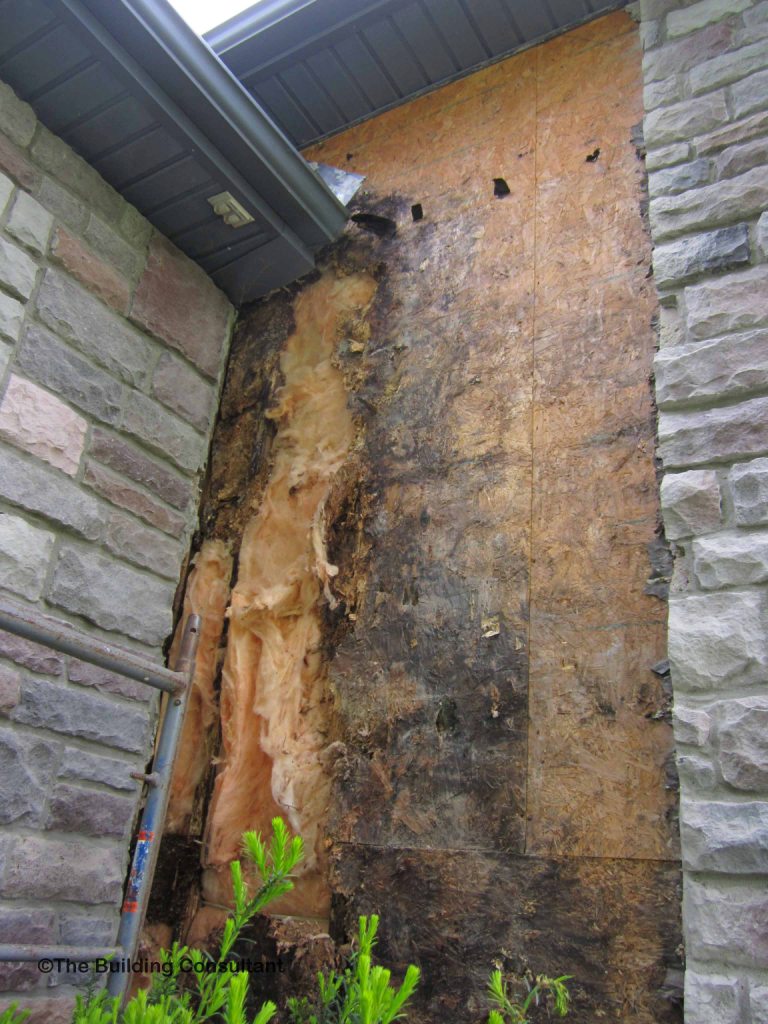
Simply, water damage to your wall cavity and framing. My intent in writing this was not “scare tactics” but rather to educate and inform. As an EDI Level 2 Certified Inspector, we know the problems that are going to come to fruition as a result of these improper installations. These missing details are rarely mentioned during home inspections as home inspections are not quantitative, are not exhaustive, and exclude design and adequacy. At the very least, your home inspector should recommend a full evaluation of the material by an inspector with an EDI Level 2 certification. I have been blessed to have the foremost cladding expert in the Country as my mentor, Mark Parlee, aka The Building Consultant. Mark has testified as an expert witness in hundreds of lawsuits totaling tens of millions of dollars nationwide. Give Mark’s website a visit at www.thebuildingconsultant.com. The following pictures are the result of an improper installation that Mark has allowed me to share from one of his cases. The client noticed moisture staining at a girder along the front foundation wall of his home and hired Mark for the evaluation. The remaining pictures show the invasive evaluation performed and the condition of the wall cavity behind.
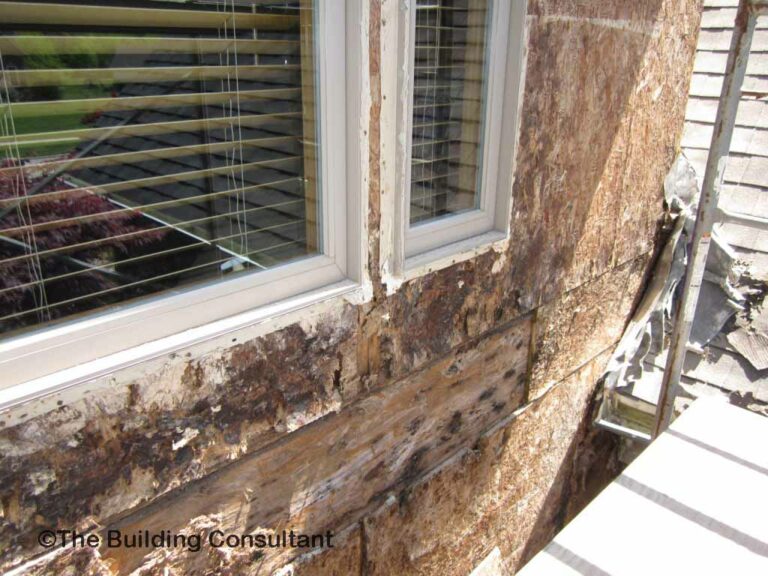
I Have ASV On My Home – What Should I Do?
I would suggest being proactive and searching the EDI website for a Level 2 inspector in your area and having a visual evaluation performed. During this evaluation, installation defects will be identified and reported with a recommendation for invasive testing. An invasive test involves drilling through the scratch coat to the underlying OSB in areas of concern (below windows, below horizontal transitions, below missing kickout flashing, etc.) At these drilled areas, moisture readings can be taken of the OSB behind, which can determine if these installation defects are allowing water behind the WRB. So you’ll either receive peace of mind or know that a problem exists that needs repair. Unfortunately, these repairs are never cheap or easy.





6 Responses
Great article~
Thank you, my friend. My specialty is cladding, so I’m going to try to make one of these per week. I’m thinking fiber cement next.
Nice! I admire the article
Thank you, Jake! Fiber cement next!
Thank you for taking the time to write this insightful article, KC. This topic is something that needs to get more visibility, more than the esthetics on the home. Unfortunately, I see many of the details discussed as part of the industry standard for installation overlooked in my area. In some instances, moisture intrusion can be taking place for many years before there are outward symptoms and by then it’s costly to repair. I’m super blessed to have both you and Mark as my mentors, and I’m glad to be part of the EDI family!
Awsome article.